As a thru-hiker and medical professional, wound care and bleeding control are two of my first aid priorities on the trail. By the numbers, the most common non-athletic trail injuries are soft-tissue wounds and subsequent infections from inadequate wound care. Proper care requires managing any bleeding, cleaning, and then dressing a wound. Wound care is part of my risk management planning when I prepare for any trip into the backcountry as a recreationalist or a group leader.
I took my first Emergency Medical Technician (EMT) course in 2008. Then I worked a variety of healthcare jobs over the next decade, ranging from critical care to primary care and family practice. When I started backpacking in 2017, it became clear that everything I learned from my healthcare career would still be of use in the backcountry.
In 2023, I took the month-long wilderness EMT (WEMT) course in Lander, Wyoming, with NOLS. The added backcountry dimension to my prehospital healthcare education has greatly influenced my preferences for my current first aid kit. In addition to the wound care essentials listed below, I always carry a tourniquet—and encourage all backpackers to learn how to use one.
The Best First-Aid Tips, According to a Wilderness EMT
When I teach Wilderness First Response courses, students often ask what I carry in my pack. Here’s what I recommend.
Personalize Your First Aid Kit
First, I emphasize that everyone’s first aid kit should be personalized, because what works for some may not work for others. I’ve found that the typical retail first-aid kits are generic and don’t quite meet my needs.
Assess Your Risk of Getting a Wound
Next, I run down what I carry through a risk management lens. This means I balance the likelihood of a particular injury or illness with its consequences. It is a complicated formula that includes variables such as the weather forecast or how far I will be from definitive care.
Over time, and after thru-hiking a few long-distance trails, I’ve struck a balance in what experience has taught me are non-negotiables versus what I desire for a baseweight.
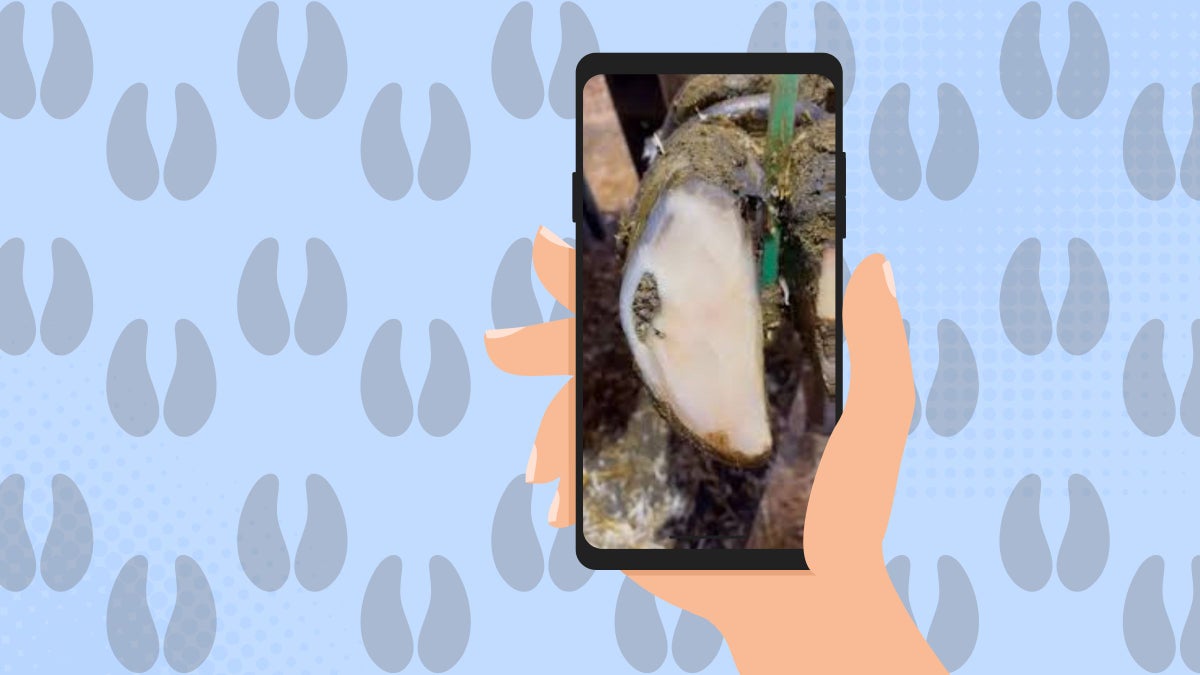
Bring Sterile Gauze and an Irrigation Syringe
I always recommend carrying some sterile 4×4 gauze pads and an irrigation syringe. These are lightweight tools and useful to everyone for bleeding control and wound care, regardless of activity or skill level.
For most bleeds, the first step is to apply pressure with a sterile gauze. That same gauze will become your initial dressing for the wound. Sterile gauze helps with infection control. However, if you have to treat bleeding and you do not have sterile gauze, infection risk becomes a secondary concern, and you should apply pressure with whatever is available.
During cleaning, flushing wounds with filtered water using an irrigation syringe is essential to preventing infection. The benefits of an irrigation syringe compared to other syringe sizes are its ability to deliver precise force into a wound, which does most of the work of removing dirt and debris.
What About Antibiotic Ointment?
Antibiotic ointment isn’t very helpful, in my opinion, because it doesn’t actually do much to prevent infection—irrigating the wound does most of that work. To ward off bacteria, change the dressing whenever it becomes really dirty or wet, or at least once a day.
How to Deal with Bloody Wounds
Depending on the type of wound and the amount of blood, you’ll need to treat them differently.
Light Bleeding
Sterile gauze is the go-to for applying pressure when necessary for persistent but manageable bleeds. Though there are different kinds of bleeding, the majority we encounter are minor cuts or capillary bleeds, which tend to ooze or bleed slowly and can be controlled with just direct pressure.
Heavy Bleeding
More aggressive bleeds will require more aggressive interventions. Larger, traumatic bleeds cause a loss of blood volume very quickly and forcefully, and it’s critical to control bleeding as soon as possible.
How to Make a Tourniquet to Stop Heavy Bleeding
Tourniquets are one tool to stop traumatic hemorrhaging in areas outside of the trunk. They work by cutting off the circulation to an extremity above the wound to stop blood flow and prevent blood loss through the wound.
There are multiple ways to create a tourniquet, but I advocate a pre-made strap and windlass system to save time on improvisation.
Because of the risk involved, tourniquets should:
- Only be applied by someone with proper training
- Initiate an immediate evacuation to definitive care
Raquel Sapp, founder of wilderness medicine education provider Backcountry Pulse, recommends the Committee on Tactical Combat Casualty Care (COTCC) approved Sam XT tourniquet because “one of the biggest mistakes people make with tourniquets is not applying it tight enough,” she says. “The Sam XT clicks when all of the slack is removed, and you can begin tightening the windlass.”
Even though I’ve been taught how to make an improvised tourniquet, I always opt for a prefabricated tourniquet because the minimal additional weight is worth the speed and effectiveness.
Of course, I wouldn’t recommend buying gear or supplies you don’t know how to use, and this article is not meant as a substitute for proper first aid training. Improper tourniquet use could result in loss of a limb or failure to control bleeding adequately.
A Wilderness First Responder course is generally 80 course hours and will include instruction on how to apply a tourniquet. Wilderness First Aid courses are much shorter—16 course hours—and also involve bleeding control and tourniquet use.
Want more Outside health stories? Sign up for the Bodywork newsletter. Ready to push yourself? Enter MapMyRun’s You vs. the Year 2025 running challenge.
The post First-Aid Tips for When You’re on the Trail, According to a Wilderness EMT appeared first on Outside Online.