
Cooking with fire is as primal as food gets—it’s a foundational facet of our humanity. Evidence suggests that humans were only able to evolve our big, energy-hungry brains after we learned to use fire to transform food, making it more nutritious and easier to eat. Diverse methods developed around the world over many millennia offer myriad options for imparting the irresistible flavor of fire, and mastering these methods will make you a much better cook.
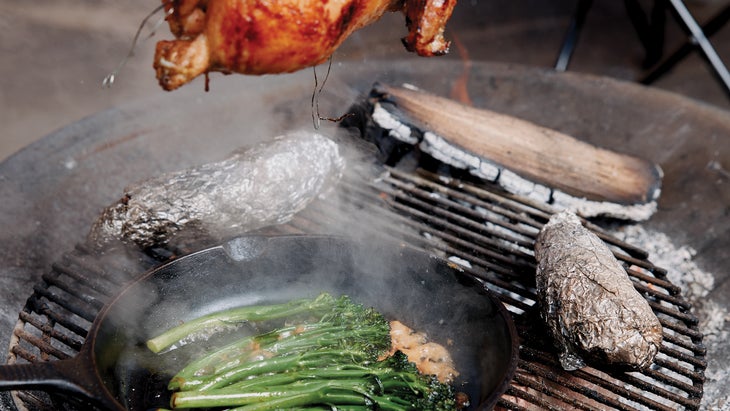
We’re all familiar with grilling, where everything sits above the heat and receives a similar char. This meal uses an open flame to cook three different components, and each one has a completely different character. It will open your eyes to the many possibilities around live-fire cooking, whether you’re in the backyard or the backwoods. Fire constantly changes, needing to be fed and adjusted, and as a result you need to reposition the food, moving it to hotter or cooler areas, or turning it so it cooks evenly. It’s an immersive and engaging (and extremely analog) process—and an excellent antidote for too much screen time.
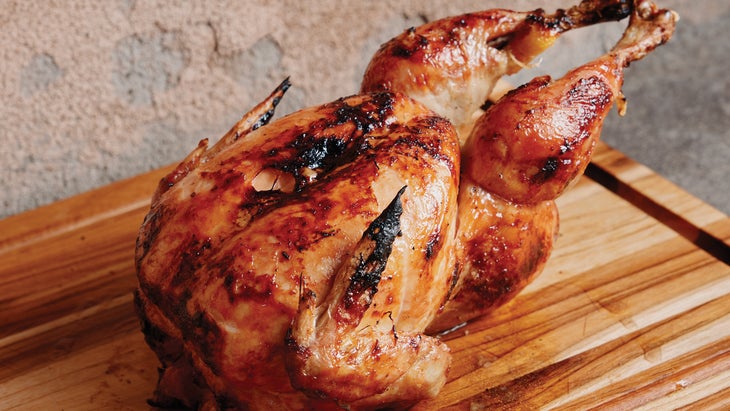
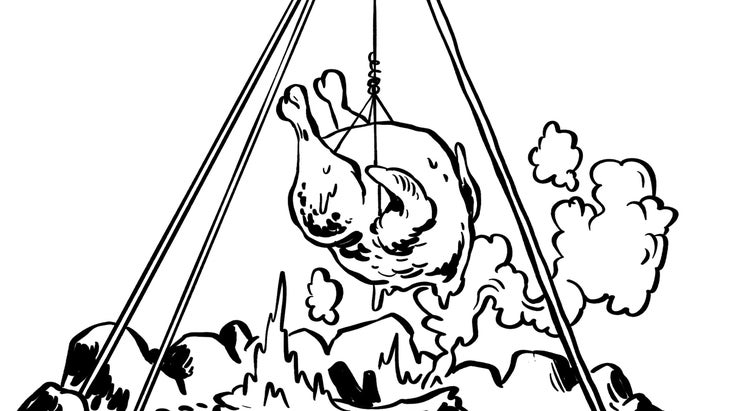
A few years ago, a chef friend turned me onto the metal tripod as an essential accessory for the firepit in my garden: three metal legs and a chain with a hook to hold the handle of a pot, like a Dutch oven, witch’s cauldron–style. It’s inexpensive, portable, adjustable, and perfect for making a slow-cooked stew on a campfire. It also produces the best chicken you’ve ever tasted: the perfect balance of grilled, roasted, and smoked flavors. This is not a quick method—optimal results generally take about three hours. But it’s worth the time investment, and you don’t have to watch it like a hawk. You can prep other ingredients, gather firewood, take a dip, or just hang out around the fire and savor the aromas.
Build Your Fire Setup
You can do this over a traditional campfire or a circular metal firepit that sits on the ground—anywhere you’re able to safely build a fire and set up the tripod. Don’t put a tripod on top of a kettle-style grill or anything that’s already on legs. Ideally, you also have a grill you can set up over part or all of the fire, because you can use that surface as both stove and grill for other parts of the meal. If you don’t, you can put your skillet directly on some embers for the mushrooms and greens.
Set up your tripod. Light a charcoal or hardwood fire that’s just off to one side of the tripod, so that the chain isn’t hanging down into the fire. Let it burn for at least thirty to forty-five minutes to create a bed of embers. Use a shovel to spread some of these out under the tripod, and keep the fire burning off to one side. You want some radiant heat from embers underneath your bird, and a nice fire burning next to it for lots of indirect heat and smoke, as well as a steady supply of more embers. You don’t want a raging bonfire, which will burn your food, and you don’t want an anemic little smolder that won’t get the job done.
Note: Fires vary, so the times here are imprecise. You’ll need to use your senses—and a meat thermometer—to determine when each component is done. The sides won’t need as long as the chicken, so once they’re cooked, put them around the perimeter to keep warm.
Prep and Cook the Chicken
If you can, rub the chicken inside and out with some salt a day ahead of time and let it sit in the fridge overnight. A pre-seasoned chicken will taste notably better than one salted right before cooking.
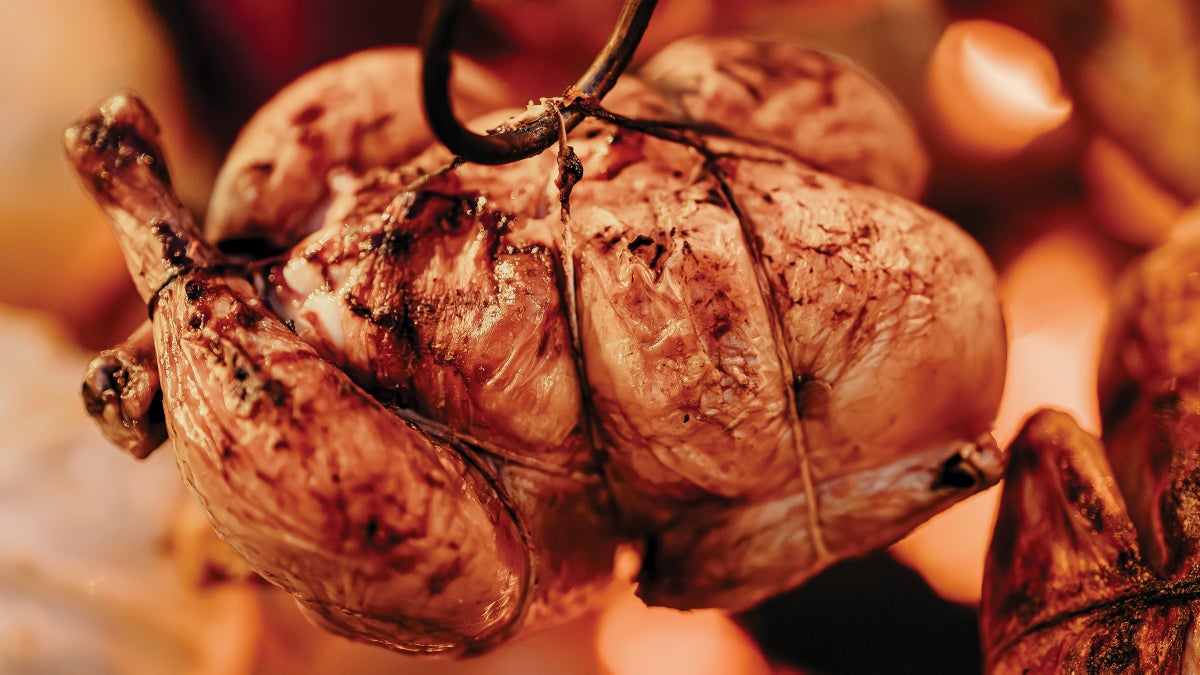
Using stainless steel or aluminum wire, you’re going to truss the chicken according to the standard method (see below), but you’re going to twist loops of wire at the neck, cavity opening, and the middle of the back. By giving you three points to hang it from, these loops will allow you to easily reposition the bird in relation to the heat—neck up, neck down, and breast down. You can also raise or lower the bird using the chain for even more control.
You don’t need to brush anything on your chicken, especially if you salted it the night before. You’ll get a beautiful golden brown and crispy skin all over as you rotate it to cook all sides. But if you want it saucier, combine equal parts soy sauce, maple syrup, vinegar, and tomato puree in a saucepan to make an easy barbecue-style sauce. Put that on or near the fire to heat up and simmer so that it reduces gently while the bird cooks. Brush it all over every half hour or so. For extra credit (and flavor), make a brush out of sprigs of rosemary, parsley, and oregano tied together with string. Or if you’re in the woods, use a couple nice bunches of fresh white pine or spruce needles to furnish your brush.
Use a poker or tongs to turn the chicken every half hour or so, using a different loop to hang it so that a different side faces the fire. Raise or lower it as needed; you want the hot side to be active, steaming and bubbling and catching some color. Feed the fire and rake out more embers as needed to maintain proper heat. It’s ready to eat when a meat thermometer inserted into the thickest part of the breast and the thigh (don’t let the probe touch bone) reads 165˚F. Let it rest for five to ten minutes before carving, and serve the extra sauce (if using) on the side.
Don’t Forget Your Vegetables
The chicken is going to drip fat and juices and some of your basting mixture (if you’re using it) as it cooks—especially when you turn it so the cavity is pointing down. Putting a pan beneath it to catch that goodness is smart, and having something in the pan to cook in those drippings is smarter still. Mushrooms make an excellent choice, especially with some slivered onions and a handful of fresh herbs. Button or cremini are fine, but if you can get oyster, maitake, or similar, you’re in for a treat.
Make sure they have a little oil or fat to get them going, sprinkle on some salt, and position the pan so it catches the drips but doesn’t burn. Stir or shake the pan regularly as the mushrooms cook, and taste before serving. When they’re done, you can move the pan off to the side to keep warm, or move the mixture to a serving bowl and use the pan to cook something else—like some broccoli rabe.
Broccoli rabe looks like lanky broccoli, but it’s more closely related to turnips. Its slight bitterness and sturdy texture make it ideal for grilling—it gets irresistibly savory and tender over a fire. Trim the stalk ends if they’re brown, then toss your rabe in enough olive oil to coat the stalks, leaves, and florets with a little shine. Sprinkle on a fat pinch of salt per bunch and toss again to distribute it evenly. When the stalks are a vivid dark green and becoming tender, take the rabe off the fire and hit it with some lemon juice and a bit more olive oil.
The Gear You’ll Need
The Tripod
Lodge Cast Iron makes a 60-inch version for $60 that’s also designed to keep a full Dutch oven off the ground, so it’ll be sturdy enough for your chicken.
Wire or Butcher’s Twine
Stainless steel or aluminum wire for the chicken is best. Alternatively, soak butcher’s twine in water for 15 minutes before trussing to reduce the singeing.
Carbon Steel or Cast-Iron Pan
If you’re making vegetables (and you’ll want to), use a pan that’s built for live-fire cooking, like carbon steel from Made In or cast-iron from Yeti.
How To Truss a Chicken
1.
Pat a 4-to-5-pound chicken dry with paper towels, and rub with a tablespoon of salt. Cut a 6-foot piece of wire or butcher’s twine.
2.
Place the chicken in front of you, breast up, with the neck pointing away from you.
3.
Make a 2-to-3-inch loop at the midpoint of the wire and twist the loop a couple of times to secure it. You want your loops to easily fit over the tripod’s hook with room to spare.
4.
Position the loop behind the back in between the wings. Cross the wire over the breasts, then around again to secure the wings. Pass the ends of the wire under the thighs and cross over the leg joints; twist to secure. Create a second loop around the ends of the drumsticks. Flip the chicken so that it’s breast-side down.
5.
Bring the wires back up to the neck, twisting one more loop at the midpoint of the back, then tie the wires to the loop at the neck and twist to secure them. Snip off any extra wire. Now you have a properly trussed bird that can be hung three different ways for even cooking.
The post How to Cook a Chicken Over an Open Flame appeared first on Outside Online.